


Master Advanced DTF Transfer: Key Tips for Pro-Level Results
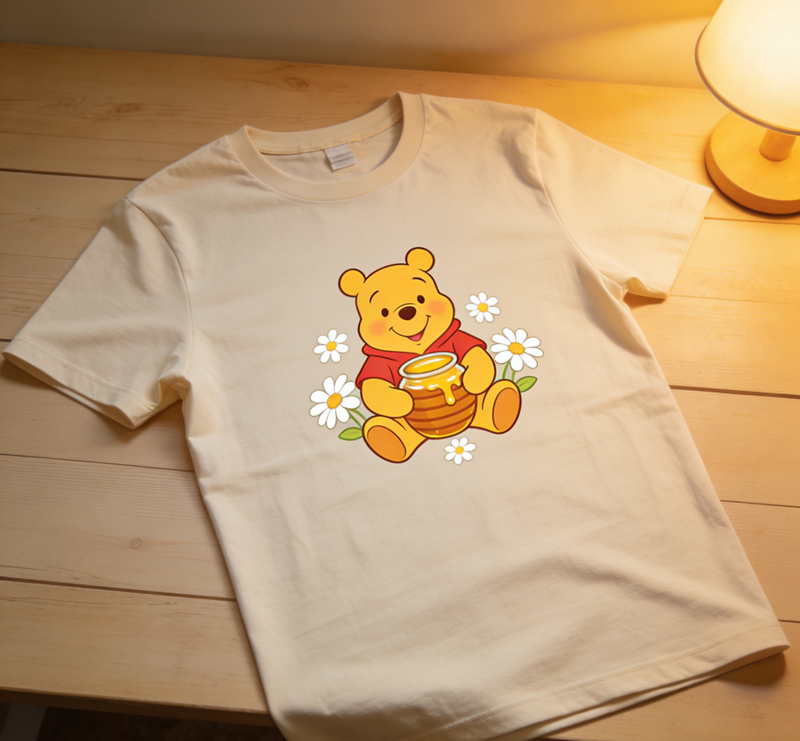
Stepping up your DTF transfer skills isn't just about sticking to standard press settings. It's about getting a grip on how adhesive melts, how different fabrics respond, and how environmental factors like humidity or static can tweak your outcomes. Nail these small details, and you'll end up with prints that feel softer, look crisper, and stand the test of time. If you're on the hunt for new methods or more transfer choices, check out our DTF transfers collection.
Core Basics for Advanced DTF Success
How adhesive melt impacts your print
During pressing, DTF adhesive powder melts into the fabric's fibers. A smooth, even melt means a seamless bond and clean print. But if the melt is spotty, you'll get matte patches, light areas, or edges that lift off.
Why fabric type matters
Cotton, polyester, tri-blends, and textured fabrics all react differently to heat. Some hold moisture longer, others stretch more, and some need to get rid of seams or lint. Knowing your base fabric makes it easy to adjust your process.
Non-Negotiable Settings Pros Swear By
Even seasoned creators don't skip the basics—heat, pressure, and peel timing—but they handle them with precision.
Check for even heat on your press
Use a heat gun or temperature strips to test multiple spots on the platen. Cold zones lead to lifting or uneven melting.
Find the perfect pressure
Aim for firm, consistent contact across the entire surface—no gaps allowed. If you're pressing over seams or pockets, use pressing pillows to keep pressure even.
Choose the right peel timing
Warm peels usually give smoother results and prevent film stretching. Most pros prefer this method because it keeps fine details sharp without pulling at the adhesive.
Prep Steps That Make All the Difference
Great DTF results start before you even hit the press. The cleaner the surface, the better the bond will be.
Key prep steps:
- Test a corner of the platen to ensure even heat
- Use alignment tools to keep designs straight
- Remove lint and static before pressing
- Flatten seams for consistent pressure
Prep for textured fabrics or seams
Use a pressing pillow or heat-resistant foam to level the surface. This avoids pressure dips and patchy transfers.
Why moisture control is critical
Moisture causes bubbling, dull spots, and weak bonds. A quick 5-10 second pre-press gets rid of hidden moisture and helps adhesive melt evenly.
Advanced Pressing Techniques for Consistency
Beyond basic time and temperature, pros adjust for fabric thickness, transfer density, and total press time. They also check melt patterns—this subtle step tells you if the print is fully cured.
How to know adhesive is fully melted
The film should peel off easily, and the print should lie flat against the fabric. If edges look grainy or lifted, press again with firm pressure.
Adjusting for thicker fabrics
Add a little extra press time and double-check pressure. Thicker fabrics absorb more heat, so they need a bit more time to ensure full melting.
Fixing Advanced DTF Problems
Once you're at an advanced level, issues are more subtle—but easy to fix once you spot the pattern.
Why gradients look grainy
Graininess usually comes from uneven heat or slight moisture in the fabric. Pre-pressing and checking platen consistency smooths out gradients.
What causes tiny bubbles
Micro-bubbles form when moisture gets trapped or adhesive melts unevenly. A final press flattens the print and seals the bond.
Aftercare for Long-Lasting Prints
Proper aftercare keeps your advanced DTF prints looking sharp for ages. High-volume sellers follow these simple rules:
Wash settings
Use cold water, wash inside-out, and choose a gentle cycle. Skip fabric softeners and harsh detergents.
Shipping tips
Let the shirt cool completely before folding to avoid impressions or gloss marks. Store in breathable packaging to prevent moisture buildup.
FAQ for Advanced Creators
1. Why do my print edges look dull?
Uneven pressure or slight moisture is usually the culprit. Re-press with firm, even pressure to fix it.
2. How to prevent large prints from wrinkling after pressing?
Do a final press with a parchment sheet and let the print cool fully before moving the shirt.
3. How to test press accuracy?
Use temperature strips on multiple platen areas and test-press scrap fabric.
4. Do advanced transfers need different peel timing?
Sometimes—dense or large prints often work best with a warm or cold peel.
5. How to stop static from ruining print placement?
Use a lint roller, spritz a light anti-static mist, or ground your surface before applying the film.


contact
Tel: +86 17706217416
Add: Building L2A, No. 520, Lane 1588, Zhuguang Road, Hongqiao World Center, Qingpu District, Shanghai, China
follow us:


